THIS WEBSITE HAS MOVED TO A NEW DOMAIN -> pra9 dot com -> pranav dot zone
Self-hosted web analytics
The “Free” analytics
Collecting more and more data to keep feed the advertising business model and make money while sacrificing user privacy has become a trend on the internet. Everytime you visit a website or open an app you can expect companies like Google, Facebook, Microsoft, Amazon, among others to track you using their analytics and they can track you because the developer of the website/app embed third party analytics as they are “free” and “advanced”.
These analytics are often advanced and promise conversions, sales, etc, they are also free because the users pay them with the user’s data. Every website/app developer wants to understand their website traffic. But when your source of income is the website (e.g. e-commerce), you want to understand user behavior, interests, and gather more data points to either retarget them later to boost conversions. But if you are a developer and use these privacy-invading analytics it can come at a great cost for you as well as the users of your website. You may want to read Why is privacy improtant?
Self-Hosted analytics
A self-hosted solution will give you complete control over your collected data and its storage. You can even self-host it on a raspberry pi and start collecting analytics right away.
There are other advantages of self-hosting an analytics solution, like bypassing AdBlockers. That sounds evil but as I don’t collect any personally identifiable data so it’s okay i guess :D
If you have are already using a third-party analytics solutions, they probably charge extra to serve the analytics from your custom domain. In case of a self-hosted instance, you can connect to multiple custom domains and subdomains at no cost.
Today we will host Ackee by electerious. It is a cookieless, non-invasive tracking solution that still providing useful insights.
Ackee has a great looking dashboard (Ackee dashoard demo) and the maintainer of this project also plans to support its development (correct me if I am wrong). If you want to support him, donate here.. So we can say it is a pay what you want to model (except for the hosting :p)
Let’s get started
My hosting stack will get you started for free (using Mongo DB, Netlify and Github) but you can also opt for other deploy options in the ackee documentation.
Requriments
- Mongo DB account
- Netlify account
- Hosted Git account, like Github or Gitlab
Optionally
Setup a MongoDB database
-
Complete the sign up process at Mongo DB.
-
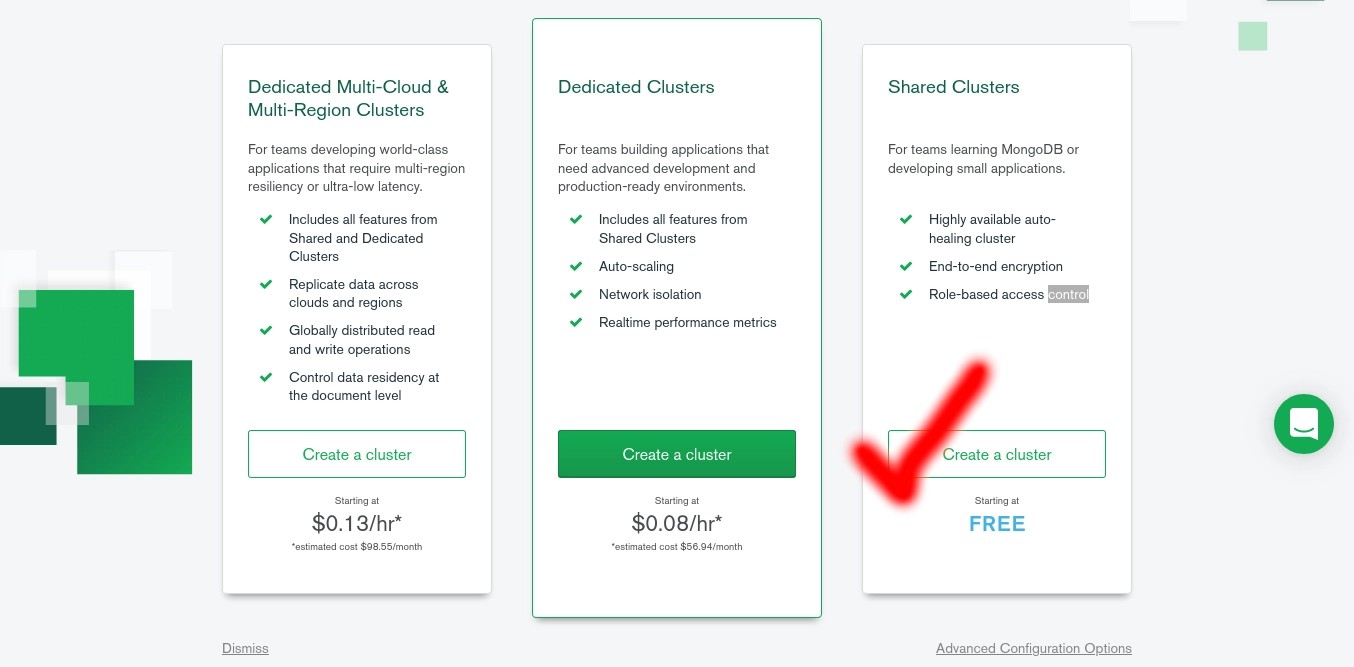
Create a free cluster
-
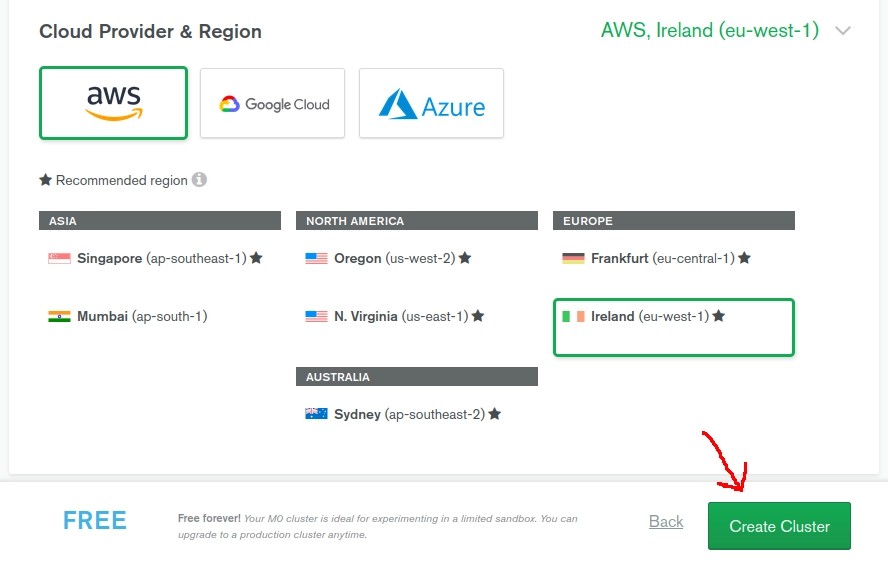
Choose your cluster hosting options. I am deploying an AWS cloud instance in Ireland.
-
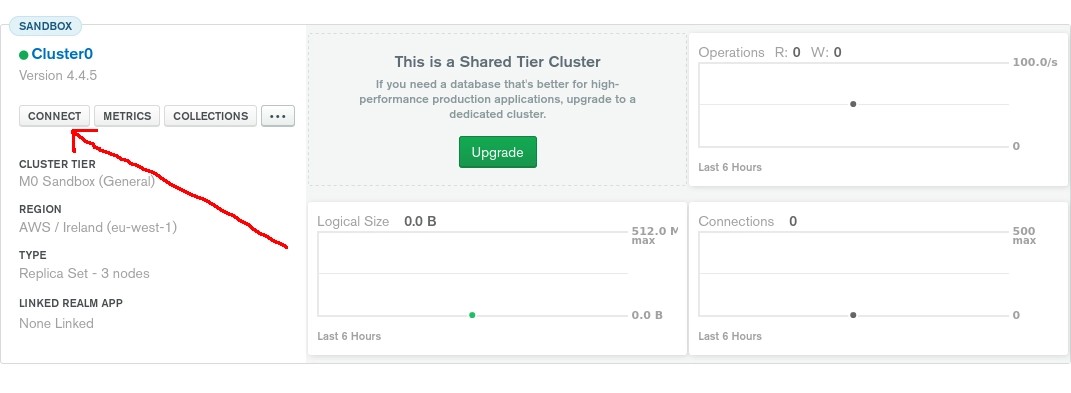
Configure the connection details for the deployed cluster.
-
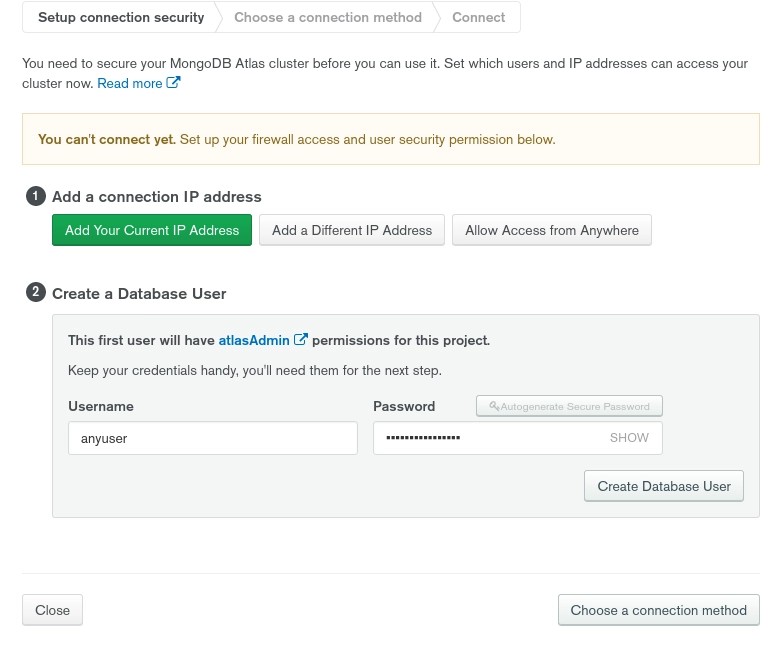
Choose the username and password for the atlasAdmin. Save these details as you will need them when connecting to the database from the Ackee instance.
-
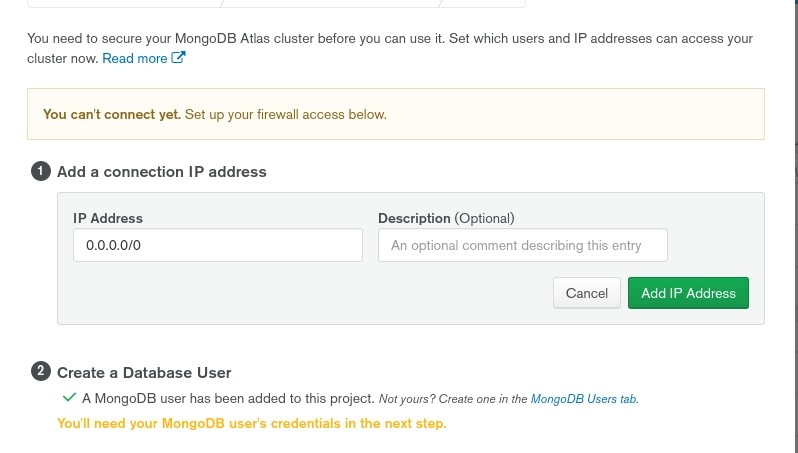
Now allow access to the cluster from anywhere by adding the 0.0.0.0/0 IP address. The Serverless function will run at the closest possible server so allow access from anywhere is necessary. Don’t worry the username and password will prevent anyone else from accessing your instance.
Deploying Ackee frontend and serverless functions
-
This is the easiest step because you can deploy it to Netlify with a click of a button.
Deploy on Netlify
-
Set the Netlify Environment variables.
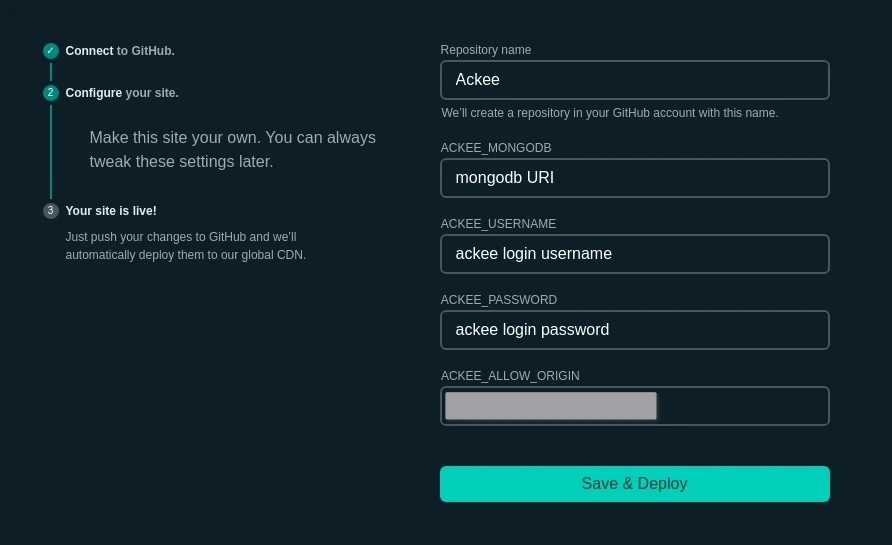
- For the ACKEE_MONGODB variable use the following URI and Replace ADMIN_USERNAME & ADMIN_PASSWORD with the username and password that you created during the cluster setup. Also, replace FIRST_DATABASE with the name of your cluster. The default name is Cluster0.
mongodb+srv://ADMIN_USERNAME:ADMIN_PASSWORD@cluster0.mongodb.net/FIRST_DATABASE?retryWrites=true&w=majority
- Set a new username and password for logging into the Ackee dashboard using ACKEE_USERNAME & ACKEE_PASSWORD variables.
- Lastly, use the ACKEE_ALLOW_ORIGIN to accept traffic only from your domains.
Install a JS snippet on your website
-
You can either use Ackee from Netlify’s subdomain or add a custom domain in the netlify site settings. Avoid using subdomains like analytics or stats to stay away from Adblockers.
-
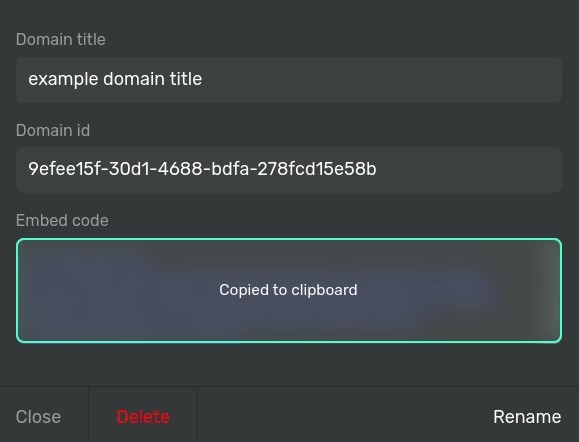
Log into Ackee dashboard, go the settings tab, add a website name and copy it’s tracking code.
-
The most privacy-respecting settings when installing the tracking script on your website can be set using data ops in the ackee tracker script.
In this example script, data-ackee-opts=’{“detailed”: false, “ignoreLocalhost”: true, “ignoreOwnVisits”: false} will ensure that any personal data is not collected and no cookies will be set because the ackee tracker will not ignore own visits.
<script async src="https://subdomain.domain.tld/tracker.js" data-ackee-server="https://subdomain.domain.tld" data-ackee-domain-id="DOMAIN_ID" data-ackee-opts='{"detailed": false, "ignoreLocalhost": true, "ignoreOwnVisits": false}'></script>
To start tracking, insert this script before the body tag of every page of your website. It is similar to installing any other analytics.
Some alternatives
- Umami.is
- Matomo
Written by Pranav. This content is licensed under CC BY-SA 4.0 (https://creativecommons.org/licenses/by-sa/4.0/)


